Why Burr Removal Is Critical for Manufacturing Engineers
10 August 2026Burr removal is critical because leftover burrs create immediate safety hazards, cause measurable functional failures, and drive manufacturing cost increases that compound across the production cycle. Every unaddressed burr is a potential assembly reject, a seal leak, a fatigue crack initiation site, or an operator injury waiting to occur.
- Safety: Sharp burrs cut assembly technicians, jam automated handling equipment, and cause misalignment during press-fit operations.
- Functional failure: Even very small burrs can prevent proper mating of precision components, block hydraulic passages, and compromise sealing interfaces.
- Economic impact: Industry survey data shows burr-related work can account for up to ~9% of total manufacturing cost for affected workpieces.
Pro Tip: Add a general edge-treatment callout to every drawing — for example, “Break all edges 0.1 x 45° unless otherwise specified” — so suppliers and machinists treat edge condition as a controlled feature, not an afterthought.
Key Takeaways
Burr removal is critical because unaddressed burrs cause functional failures, safety hazards, and measurable manufacturing cost increases that affect every stage of the production cycle.
| Point | Details |
|---|---|
| Economic cost of burrs | Burr-related work can account for up to ~9% of total manufacturing cost for affected workpieces, including ~15% increase in cycle time and ~2% added reject rate. |
| Functional failure threshold | Burrs as small as 0.05 mm can prevent proper mating in precision assemblies and cause sealing failures in hydraulic and pneumatic systems. |
| Method selection discipline | Almost every deburring method alters part geometry or surface finish; match the method to tolerance proximity and surface requirements before committing to a process. |
| Design-for-deburring priority | Specifying edge treatments on drawings and keeping critical tolerances at least 0.2 mm from deburred edges reduces rework and prevents assembly rejects. |
| Biax-flexwellen for confined access | Flexible shafts from Biax-flexwellen enable controlled deburring in confined installations where rigid tooling cannot reach critical burr locations. |
Table of Contents
- What a burr is and how it forms
- Why burrs left in place cause serious engineering problems
- A practical survey of deburring methods and their limitations
- How to select the right deburring method for your application
- Design and process changes that reduce burr formation
- Research findings and practitioner insights on burr economics and risk
- What to do immediately when burrs appear on production parts
- A working engineer’s perspective on deburring trade-offs
- Precision deburring access for confined and complex geometries
- Sources
What a burr is and how it forms
A burr is an unwanted raised projection of material at a workpiece edge or surface, produced when a cutting, shearing, or thermal process displaces material rather than cleanly separating it. Burrs differ from intentional edge features: a chamfer or radius is a designed, dimensioned geometry; a burr is an uncontrolled residual. A recast layer from EDM or laser cutting is a related but distinct defect — a hardened, re-solidified surface zone rather than a mechanical protrusion.
Common burr morphologies:
- Rollover (knife) burr: Material folds over at the tool exit edge. Typical in milling and drilling exits. Often the largest burr type by height.
- Tear burr: Material tears rather than shears cleanly, leaving a ragged, irregular projection. Common in punching and shearing of ductile alloys.
- Burr root / secondary burr: A thin fin at the base of a primary burr, sometimes left behind after the primary burr is removed. Frequently missed in inspection.
- Dross / recast: Resolidified material at the kerf edge in laser, plasma, or waterjet cutting. Harder than the parent material and more difficult to remove mechanically.
Burr formation mechanisms vary by process. In machining operations, burrs form at tool exit points where the cutting edge leaves the workpiece and unsupported material deflects rather than fractures. Tool wear accelerates burr height because a worn edge pushes rather than cuts. In punching and blanking, the punch-to-die clearance governs burr height: insufficient clearance produces tall, thin burrs; excessive clearance produces wide, rounded ones. Thermal cutting processes introduce dross and recast zones whose thickness depends on feed rate, power, and assist-gas pressure.
Why burrs left in place cause serious engineering problems
The consequences of unremoved burrs span operator safety, functional performance, and downstream process integrity. Industry guides confirm that deburring addresses operator safety, coating adhesion, sealing integrity, and particulate contamination simultaneously — none of these is a cosmetic concern.
Safety and production risks:
- Sharp rollover and tear burrs cut assembly technicians during manual handling, particularly on sheet-metal edges and drilled hole exits.
- Burrs on mating faces cause misalignment during press-fit and bolted assembly, leading to cross-threading, fastener galling, and structural misalignment.
- Detached burr particles jam automated conveyors, damage precision spindle bearings, and contaminate clean-room assembly environments.
Functional failure modes:
Burrs on sealing surfaces prevent O-rings and gaskets from seating correctly, producing leak paths in hydraulic, pneumatic, and fuel systems. In electrical assemblies, conductive burr particles cause shorts across PCB traces or connector contacts. Stress concentration at a burr root accelerates fatigue crack initiation under cyclic loading — a particular concern in aerospace structural components and rotating machinery. Practical shop data shows that burrs as small as 0.05 mm prevent proper mating in tight-tolerance assemblies, making them a frequent root cause of “parts don’t fit” rejects.

Downstream finishing and contamination:
Burrs trap plating solutions, anodizing electrolytes, and passivation chemicals, creating localized corrosion sites after treatment. In medical device manufacturing, burrs on implant surfaces compromise sterilization and create tissue-damage risks. In aerospace hydraulic systems, detached burr particles entering fluid passages can cause valve blockage or actuator seizure — a failure mode with direct airworthiness implications.
Economic scale: A review paper and industry survey found that burr-related work — minimization, deburring, and cleaning — can increase manpower and cycle times by approximately 15%, add roughly 2% to reject rates and about 4% to machine breakdown time, producing an average share of up to ~9% of total manufacturing cost for affected workpieces.
A practical survey of deburring methods and their limitations
Modern CNC shops integrate deburring into QA workflows rather than treating it as a final cosmetic step, and the method chosen directly affects part geometry, surface finish, and material properties. Trade-press guidance is clear: almost every common deburring process alters part geometry or surface finish in some way, so method selection must match tolerance and surface requirements.
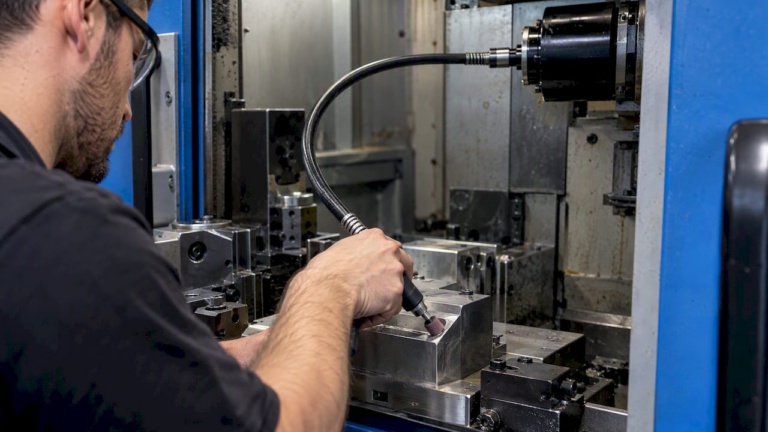
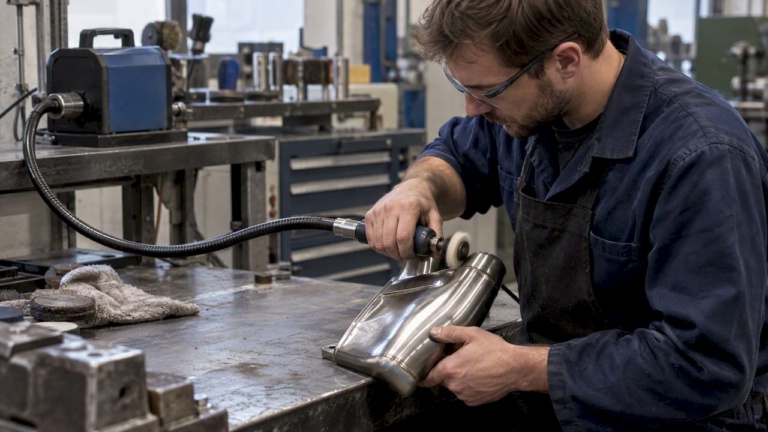
Manual deburring: Files, scrapers, and hand-held rotary tools. Effective for accessible external burrs on low-volume parts. Highly operator-dependent; inconsistent on complex geometries. No dimensional risk when performed carefully, but difficult to control on tight-tolerance surfaces.
Abrasive brushing: Nylon-filament or wire brushes mounted on CNC spindles or dedicated brush stations. Good for edge-breaking on prismatic parts. Removes rollover burrs reliably; less effective on tear burrs or internal passages. Brush pressure and dwell time must be controlled to avoid rounding critical edges.
Vibratory/tumbling finishing: Parts tumble with abrasive media in a bowl or trough. Suitable for high-volume, small-to-medium parts with accessible external geometry. Removes light burrs and improves surface finish simultaneously. Not suitable for internal passages, delicate features, or parts with tight tolerances on external edges, as media contact is uncontrolled.
Thermal energy deburring (TEM): A combustible gas mixture ignites inside a sealed chamber, producing a brief, intense thermal pulse that burns off thin burrs. Highly effective on internal and hidden burrs inaccessible to mechanical methods. The thermal pulse is short enough to avoid bulk heating, but recast or oxide layers may form on some alloys. Not suitable for thermally sensitive materials or parts with thin walls.
Electrochemical deburring (ECD): An electrolytic cell dissolves material at the burr site using a shaped electrode. Precise and repeatable; removes burrs from internal passages and cross-holes without mechanical contact. Requires fixturing and electrolyte management. Removes material from all exposed surfaces within the electrode field, so dimensional impact must be accounted for in design.
Electropolishing: Removes material uniformly from all surfaces in an electrolytic bath, smoothing micro-peaks including small burrs. Predictable material removal, typically a few micrometers. Improves corrosion resistance on stainless steel. Not selective — removes material from all surfaces, including critical bore diameters and thread flanks.
CNC/abrasive machining: Programmed tool paths with abrasive or carbide tools remove burrs as a controlled machining operation. High repeatability and dimensional control. Requires accessible geometry and a defined tool path. Suitable for production volumes where burr location is predictable.
Laser deburring: A focused laser ablates burr material. Precise and non-contact; effective on thin burrs and recast removal from laser-cut edges. Heat-affected zone (HAZ) is localized but present. Not practical for large burrs or high-volume throughput on most current systems.
Cryogenic deburring: Parts are cooled with liquid nitrogen until burrs become brittle, then tumbled with plastic media that fractures the embrittled burrs without affecting the bulk part. Effective for elastomeric and plastic components; less common for metals. Requires cryogenic handling infrastructure.
| Method | Burrs removed | Dimensional impact | Best for |
|---|---|---|---|
| Manual | External, accessible | Minimal if controlled | Low volume, complex geometry |
| Abrasive brushing | External rollover | Low to moderate | Prismatic parts, CNC integration |
| Vibratory/tumbling | Light external | Low to moderate | High volume, small parts |
| Thermal energy (TEM) | Internal, hidden | Low (oxide risk) | Internal passages, cross-holes |
| Electrochemical (ECD) | Internal, hidden | Moderate (all surfaces) | Cross-holes, hydraulic passages |
| Electropolishing | Light, all surfaces | Moderate (uniform) | Stainless, corrosion-critical parts |
| CNC/abrasive | Predictable locations | Low (controlled) | Production volumes, defined geometry |
| Laser | Thin, recast | Low HAZ | Precision, thin burrs |
| Cryogenic | Brittle materials | Minimal | Elastomers, plastics |
Key limitations to note:
- Electrochemical and thermal methods reach internal burrs that manual and brush methods cannot, but both require process-specific fixturing.
- Electropolishing removes burrs predictably but removes material from all surfaces, which can break bore tolerances if not accounted for in the design stage.
- Vibratory finishing is unsuitable for parts with features that must not contact media, such as precision bearing seats or thread forms.
How to select the right deburring method for your application
Method selection is a structured decision, not a default. The following checklist covers the criteria that most often determine which process is appropriate and where standard methods will fail.
Selection checklist:
- Material and hardness: Hardened steels and titanium alloys resist abrasive methods; electrochemical or thermal methods are often more effective. Soft alloys (aluminum, copper) are prone to smearing with aggressive abrasives.
- Burr morphology and height: Tall rollover burrs may need to be machined before finishing. Thin tear burrs on ductile alloys respond well to brushing or tumbling.
- Proximity to critical tolerances: If a burr sits within 0.2 mm of a tolerance-critical surface, any method that removes material from that surface requires a dimensional impact assessment before use.
- Surface finish requirements: Electropolishing and vibratory finishing alter Ra values; verify that the resulting finish meets drawing requirements.
- Production volume and takt time: Manual deburring is economical at low volumes; automated brushing, TEM, or ECD become cost-effective as volume increases.
- Accessibility: Internal cross-holes, blind passages, and confined geometries require TEM, ECD, or flexible-shaft-mounted tools. External-only methods will not reach them.
- Contamination and cleanliness requirements: Aerospace and medical parts require post-deburring cleaning validation. Electrolyte residues from ECD and media fragments from tumbling must be fully removed and verified.
Red flags that require a different approach:
- Burrs adjacent to H7/g6 fit zones or precision bearing seats: standard abrasive methods risk breaking the fit clearance. Specify a controlled, dimensionally tracked method or redesign the feature exit geometry.
- Parts with thin walls or heat-sensitive alloys: TEM and laser deburring introduce thermal effects that may alter material properties.
- Medical implants and aerospace fluid-system components: sterilization and cleanliness validation requirements typically mandate a documented, validated deburring process, not ad hoc manual finishing.
When red flags appear, the correct response is either a controlled process change (validated ECD or TEM with pre/post dimensional inspection) or a design change that moves the burr-generating feature to an accessible, tolerance-remote location.
Design and process changes that reduce burr formation
Treating deburring as a strategic design decision rather than a final cleanup task reduces rework and stabilizes production. Specifying edge conditions early — before the first production run — prevents the most common sources of assembly rejects and downstream finishing defects.
Design rules for minimizing burrs:
- Specify edge treatments explicitly on every drawing. A general note such as “Break all edges 0.1 x 45° unless otherwise specified” removes ambiguity for machinists and suppliers and establishes edge condition as a controlled feature per ASME Y14.5 and ISO 13715 conventions.
- Keep critical tolerances at least 0.2 mm from any deburred edge. This provides clearance for the deburring operation without risking dimensional impact on the functional surface.
- Avoid machining through threaded features. Tool exit through a thread form produces a burr that is difficult to remove without damaging the thread flanks.
- Place high-risk exit features — drilled hole exits, slot ends, cross-hole intersections — where they are accessible to the chosen deburring method. A cross-hole that exits into a blind cavity cannot be reached by brushing or manual tools.
- Design chamfers at hole entries and exits. A 0.5 x 45° chamfer at a drilled hole exit reduces rollover burr height and makes residual burrs easier to remove.
Process recommendations:
- Use sharp tooling and monitor tool wear closely. A worn cutting edge is the single most common cause of oversized burrs in production.
- Optimize feeds and speeds for clean chip separation at the tool exit. Higher feed rates in ductile materials often produce smaller burrs than slow, rubbing cuts.
- Sequence deburring before final grinding or honing operations on bore-critical features, so the finishing operation cleans up any deburring-induced surface variation.
- Perform deburring before surface treatment (plating, anodizing, passivation) to prevent chemical entrapment at burr roots.
Pro Tip: When burr location is predictable — for example, at a consistent drill-exit point — design the fixture or part orientation so the burr exits into a relief groove or chamfer. This concentrates the burr in a non-functional area and simplifies removal to a single, repeatable operation rather than a variable hand-finishing task.
Research findings and practitioner insights on burr economics and risk
The economic case for preventive deburring is well-documented. The review paper cited earlier quantifies the aggregate cost: burr-related work increases manpower and cycle times by approximately 15%, adds roughly 2% to reject rates and about 4% to machine breakdown time, and can represent up to ~9% of total manufacturing cost for affected workpieces. For a production line running at volume, that share is a recoverable cost — one that design-for-deburring and process control can reduce directly.
Practitioner experience reinforces the economics: reducing burr formation through tool exit geometry and feed/speed control typically costs less than extensive downstream deburring. A design change that moves a cross-hole exit to an accessible face, or a toolpath adjustment that reduces burr height at a milled slot end, eliminates a manual rework step that would otherwise recur on every part.
Over-deburring is a real risk that practitioners often understate. Removing too much material at a bore entrance or shaft shoulder can break H7/g6 fit clearances, requiring the part to be scrapped rather than reworked. Precision components sometimes require specialized finishing methods — controlled ECD, electropolishing with pre-calculated material removal, or CNC-programmed edge-breaking — specifically to avoid altering key dimensions while still meeting edge-condition requirements.
A documented case from hydraulic system manufacturing illustrates the failure mode clearly. Burrs at cross-hole intersections in a valve body detached during system flush and lodged in a spool valve, causing erratic actuation. The corrective action combined a redesigned cross-hole exit geometry, a validated TEM deburring step, and a post-deburring cleanliness verification using particle count analysis. The design change alone reduced burr height at the critical intersection by more than half; the TEM step eliminated residual burrs that the geometry change could not prevent entirely.
Pro Tip: Set inspection acceptance limits for burr height based on the functional consequence, not on what is easy to see. A 0.05 mm burr on a seal face is a reject; the same height on a non-functional chamfer is acceptable. Calibrating limits this way prevents both false positives that drive unnecessary rework and false negatives that pass functional failures.
What to do immediately when burrs appear on production parts
When burrs are detected on production parts, a structured response prevents defective parts from reaching assembly and establishes the data needed for permanent corrective action.
- Contain suspect lots. Quarantine all parts produced since the last confirmed clean inspection. If the burrs present a safety or functional risk — seal faces, hydraulic passages, structural interfaces — stop affected assembly operations immediately until the lot is cleared or reworked.
- Measure and classify the burr. Use tactile profilometry, optical comparators, or calibrated vision systems to measure burr height and characterize morphology (rollover, tear, dross). Photograph representative samples and record measurements against the drawing’s edge-condition callout. This data drives root-cause analysis and supports supplier change control.
- Apply short-term fixes while investigating. Authorize local hand deburring or selective rework for contained lots, with 100% inspection after rework. Simultaneously initiate a root-cause analysis: check tool wear, feeds and speeds, punch-to-die clearance, or thermal cutting parameters depending on the process involved.
- Update inspection criteria and implement permanent mitigation. Revise the inspection plan to include explicit burr-height checks at the identified feature. Issue a supplier change-control notification if the parts are externally sourced. Plan permanent mitigation — a design change to move the exit feature, a process parameter adjustment, or integration of a validated deburring step into the production sequence — and verify effectiveness with a production trial before closing the corrective action.
A working engineer’s perspective on deburring trade-offs
The most common mistake in production deburring is treating it as binary: either remove every burr completely or accept whatever the process produces. Neither extreme is correct, and both create problems.
In most structural and mechanical applications, a small, stable burr on a non-functional surface is acceptable. The engineering question is whether the burr affects a functional interface — a seal face, a bearing seat, a fluid passage, a fatigue-critical fillet. Where the answer is yes, zero-burr is not a preference; it is a functional requirement. Thrust reverser fluid passages, valve actuation ports, and hydraulic manifold cross-holes fall into this category without exception. A burr that detaches in service in any of these locations is an airworthiness event, not a quality escape.
Where the answer is no — a cosmetic edge on a bracket, a non-sealing face on a structural fitting — the cost of achieving zero-burr rarely justifies the inspection and rework burden. The practical approach is to define acceptance criteria by function, document them on the drawing, and inspect against them consistently.
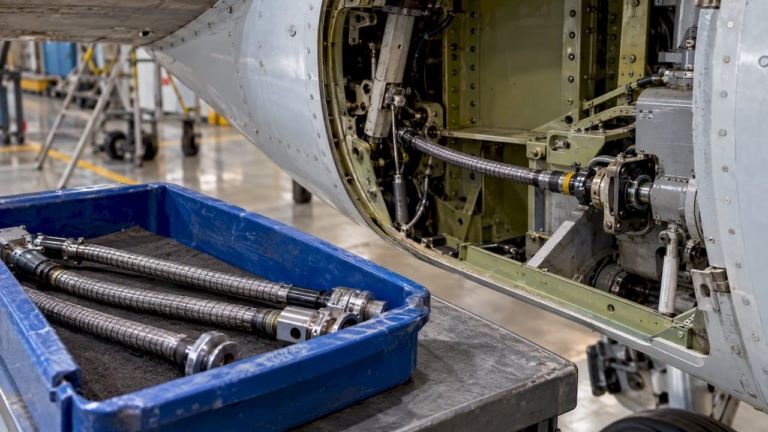
Confined installation environments add a further constraint. In thrust reverser actuation systems and flap track assemblies, deburring after installation is sometimes the only option because disassembly is not feasible. Flexible shafts used with precision finishing tools allow controlled deburring in confined geometries without removing the surrounding structure, which is where access-engineered drive solutions provide genuine functional value rather than convenience.

Precision deburring access for confined and complex geometries
When the geometry of a part or assembly prevents standard tooling from reaching a burr, the constraint is access, not method. Flexible shafts transmit torque and rotation around bends and through confined spaces, allowing precision finishing tools — abrasive stones, brushes, and small rotary files — to reach cross-holes, internal passages, and recessed features that rigid spindles cannot access.
Biax-flexwellen designs and manufactures industrial flexible shafts for exactly these applications: controlled deburring and edge finishing in tight or hard-to-reach installations, including integration with hand tools and small machine fixtures. Standard and custom configurations are available to match torque, RPM, and coupling requirements for specific finishing tasks.
Engineers specifying deburring processes for confined geometries or precision finishing requirements can review flexible shaft applications for industrial manufacturing or contact Biax-flexwellen directly for a technical discussion of access and drive requirements.
Sources
- doi:10.1016/j.cirp.2009.09.004
- Advancedmanufacturing
- Are Burrs Causing Your Assembly and Fit Issues?
- Why is Deburring Important | Finishing Systems
Recommended
- Remove Burrs in Manufacturing: A Practical Engineer’s Guide – BIAX Flexwellen
- Precision engineering terminology explained for manufacturing
- Blog – BIAX Flexwellen
- How flexible shafts enhance precision deburring in manufacturing
Related Topics
Send your spec inquiry
Custom flexible shafts for your application — we quote within 1 working day.