How to Optimize Grinding With Flexible-Shaft Drive Systems
17 August 2026A correctly specified flexible-shaft drive, matched to tooling, routing, and operating parameters, delivers the required surface finish and material removal rate while preserving shaft life. Optimizing grinding, deburring, or polishing performance with a flexible-shaft system comes down to five decisions: shaft construction, rated torque and RPM with an appropriate service factor, minimum bend radius, lubrication and inspection cadence, and early modeling of torsional behavior before the design freezes.
Use this checklist during specification or design review:
- Confirm rated torque and service factor against peak tool load, not average load.
- Set the RPM band and verify it against the shaft’s speed rating and the tool’s optimal cutting speed.
- Respect the shaft’s minimum bend radius across the entire routed path, not just at the tightest point.
- Define a lubrication schedule tied to duty cycle, not a calendar default.
- Specify the collet or coupling interface with a stated runout tolerance.
- Plan dust extraction and cooling before finalizing the handpiece enclosure.
- Add monitoring for vibration and axial stretch, especially on shafts run near rated torque.
BIAX Flexwellen flexible shafts, like most well-designed constructions in this category, typically operate at 85% to 95% efficiency, which sets a realistic loss margin for motor sizing. Minimum bend radius and service factor are the two design rules most often ignored at the concept stage, and both are cheap to fix on paper and expensive to fix after tooling is cut.
Pro Tip: For aerospace and other precision applications where torsional stiffness governs positioning accuracy, choose a stiffer shaft construction or shorten the routed length rather than compensating for compliance with higher motor torque. Adding torque to a compliant shaft amplifies windup and lag instead of solving it.
Key Takeaways
Optimizing grinding with a flexible-shaft drive requires matching torque, RPM, and construction to the tool’s actual load, then validating that match with modeling and physical testing before production release.
| Point | Details |
|---|---|
| Integrate early | Select shaft construction and routing before the enclosure geometry is frozen, since stiffness and flexibility trade off against each other. |
| Match torque and RPM | Size the shaft and motor from required torque at the tool, applying a service factor of 1.5x or higher for shock loads. |
| Respect minimum bend radius | Keep every routed segment above the specified minimum radius to control internal friction and heat. |
| Model and test before deployment | Validate torsional stiffness, axial stretch, and resonance with modeling and a physical acceptance test protocol. |
| Specify with BIAX Flexwellen support | Use standard or custom BIAX Flexwellen shafts and engineering guidance for torque, RPM, and coupling interfaces outside catalog ranges. |
Table of Contents
- What Does “Optimize Grinding” Mean for Flexible-Shaft Systems?
- How Do You Specify the Shaft, Motor, and Coupling for Reliable Grinding?
- What RPM and Torque Limits Keep the Shaft Safe?
- How Do You Match Tooling and Abrasives to the Drive?
- How Should You Route and Support the Shaft to Avoid Premature Wear?
- Why Model and Test Before Field Deployment?
- What Maintenance Schedule Preserves Shaft Life?
- What Changes for Aerospace and Confined-Space OEM Applications?
- An Engineering Perspective on Getting Flexible-Shaft Grinding Right
- How BIAX Flexwellen Supports Grinding System Specification
- Sources
What Does “Optimize Grinding” Mean for Flexible-Shaft Systems?
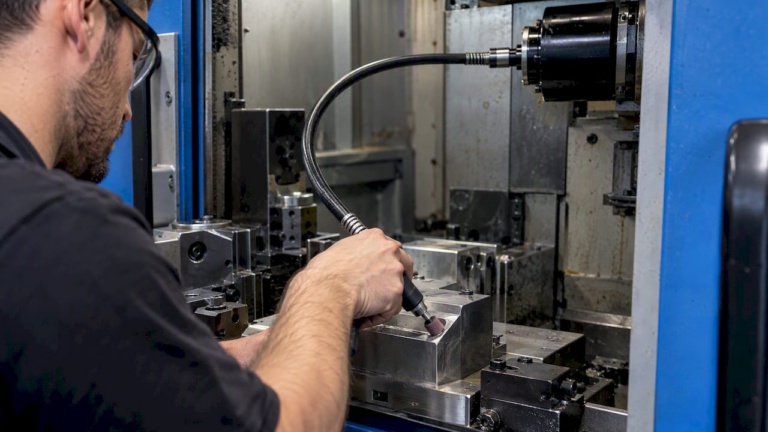
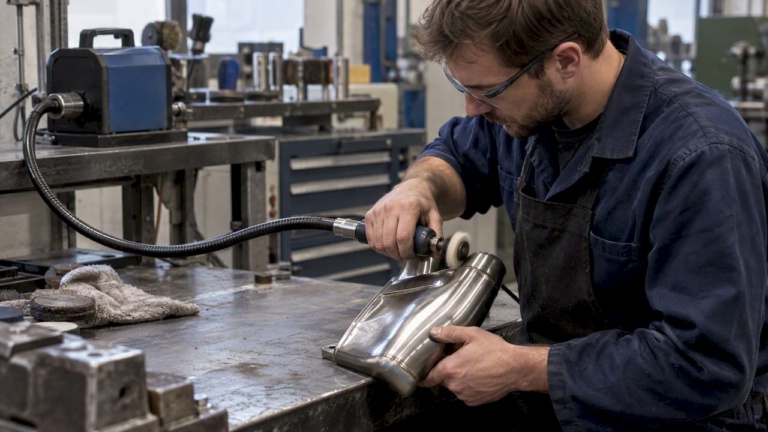
In this context, optimizing grinding means tuning a motor, flexible shaft, and handpiece or fixed-head tool so the system consistently hits a target surface finish and removal rate without shortening shaft life. This is distinct from cylindrical, surface, or circuit grinding on stationary machine tools. The scope here is rotary finishing work performed through a flexible shaft, the kind used for deburring castings, blending welds, and polishing internal passages that a rigid spindle cannot reach.
Four outcomes define whether a flexible-shaft grinding system is optimized:
- Surface roughness (Ra/Rz) consistent within a defined band across the full production run.
- Material removal rate that meets cycle-time targets without overheating the workpiece or tool.
- Repeatability across operators and shifts, particularly in manual finishing cells.
- Shaft lifetime, measured in run hours before sheath or wire fatigue requires replacement.
Getting there requires balancing a short list of mechanical parameters: torque capacity, torsional stiffness versus bending flexibility (these work against each other by design), minimum bend radius, axial stretch under load, operating speed, and transmission efficiency. Every one of these interacts with the others. Increase torsional stiffness to reduce windup, and you reduce how tightly the shaft can route through a confined housing. That tradeoff is the core engineering problem this entire article addresses, and it has no universal answer, only a correctly weighted one for each application.
How Do You Specify the Shaft, Motor, and Coupling for Reliable Grinding?
Start at the tool, not the motor. Determine the torque required at the working end for the target material removal rate, then work backward through the drivetrain.
- Establish required torque at rpm. Pull this from the abrasive tool’s data or from bench testing on representative stock, not from motor nameplate ratings.
- Apply a service factor. A factor of 1.5 is common for steady, single-shift deburring; intermittent, high-shock work like heavy weld blending often justifies 2.0 or higher.
- Select shaft diameter and construction. Diameter, wire gauge, and the number of wound layers all affect torque capacity, bending flexibility, and torsional deflection simultaneously, so a diameter increase to gain torque capacity always costs some routing flexibility.
- Match motor power and speed range. Size the motor to deliver rated torque across the working RPM band without forcing operation near the shaft’s point-of-helix, the torque threshold above which the shaft begins to distort into a helical shape under load.
- Define the coupling and collet interface. Specify runout tolerance, retention method, and whether the application needs quick-change tooling.
A worked example: if the tool requires 0.8 Nm at 8,000 rpm and the application involves intermittent shock loading, apply a 2.0 service factor to size the shaft and motor for 1.6 Nm at that speed. Back-calculate shaft diameter from the manufacturer’s torque-versus-diameter curve at that duty rating rather than assuming a standard shaft will absorb the margin.
Pro Tip: Specify axial retention at the end fitting explicitly. Axial stretch under sustained torque can work fittings loose over time, and a fitting that relies on friction alone is a common field failure point.
What RPM and Torque Limits Keep the Shaft Safe?
Run the shaft within its rated torque and RPM band, avoid sustained operation near the point-of-helix, and stay below the speed threshold that requires specialized casing and lubrication unless the design has been custom-rated for it. Below roughly 3,000 rpm, standard flexible-shaft constructions handle most deburring and polishing work without special provisions. Between 3,000 and 12,000 rpm, casing material, lubrication interval, and balance quality all deserve closer inspection. Above 12,000 rpm, treat the shaft, casing, and coupling as a custom-engineered assembly rather than a catalog selection.

| RPM band | Design action | Monitoring recommendation |
|---|---|---|
| Below 3,000 rpm | Standard shaft and casing | Routine visual inspection |
| 3,000 to 12,000 rpm | Verify casing rating and lubrication interval | Check temperature rise and vibration monthly |
| Above 12,000 rpm | Custom shaft, casing, and balancing | Continuous vibration and temperature monitoring |

Torque at the tool equals motor torque multiplied by any gear reduction, minus transmission losses. Continuous-duty applications should be sized well inside rated torque; short-duty cycles with cooling gaps between passes can run closer to the rated maximum without accelerating fatigue.
Recommended speed control:
- Use a variable-speed drive with soft-start to avoid torque spikes at startup.
- Add torque-limiting control on any application prone to tool binding or workpiece snagging.
- Monitor continuously for overload rather than relying on periodic manual checks.
Stop the machine immediately if you observe excessive vibration, a sudden rise in casing temperature, or an abrupt torque spike. These are early indicators of shaft distress, not tolerances to work through.
How Do You Match Tooling and Abrasives to the Drive?
Choose tooling that removes the required material per pass without exceeding the shaft’s torque rating or generating excessive heat at the selected speed. Working backward from a torque limit to select tooling avoids the common mistake of picking an aggressive abrasive first and then discovering it stalls the drive.
- Match shank size and collet compatibility exactly; undersized shanks introduce runout that shows up as chatter marks on the workpiece.
- Select abrasive grit and bond for the base material: harder bonds and coarser grit for stock removal on ferrous castings, softer bonds and finer grit for finishing passes on nonferrous or hardened surfaces.
- Recognize that larger attachment diameters increase torque demand at a given surface speed, which can push the system past its rated envelope even when RPM stays constant.
- Balance every attachment. An out-of-balance mounted point at 15,000 rpm generates vibration that fatigues the shaft’s inner core well before the abrasive itself wears out.
Pro Tip: Small-diameter attachments need tighter collet runout tolerance than large ones. A wheel running at high rpm with even minor runout compounds into visible chatter marks on the finished surface.
How Should You Route and Support the Shaft to Avoid Premature Wear?
Route every shaft segment above its specified minimum bend radius, and eliminate tight S-bends, kinks, or coiled loops that concentrate internal friction. Internal friction rises sharply as bend radius decreases, because the wound wires inside the shaft press harder against each other, raising free-running torque and heat generation.
Mounting and support practices that protect shaft life:
- Fix the motor housing rigidly; a floating motor mount introduces uncontrolled shaft movement.
- Add intermediate guides on runs longer than a few feet to prevent sagging and self-induced coiling.
- Clamp the protective casing at regular intervals rather than letting it hang unsupported.
- Provide strain relief at both end fittings to isolate the inner shaft from bending loads at the connection points.
Axial stretch under sustained torque is a real failure mode, not a theoretical one: end fittings can pull loose if the retention design doesn’t account for it. For vibration control, dynamically balance every attachment and consider a vibration-damping coupling where isolation from motor-side vibration matters more than absolute torque transfer. Damping couplings trade a small amount of torque transmission for reduced vibration, while rigid couplings transmit torque with minimal loss but demand near-perfect shaft alignment.
Request a routing sketch during design review that marks permitted bend geometry against forbidden layouts, and note where supports and extraction ports belong before the enclosure is finalized.
Torsional stiffness and bending flexibility move in opposite directions by design. A shaft optimized for tight routing will twist more under load; a shaft optimized for torsional rigidity will resist the sharp bends that make flexible-shaft drives useful in the first place. Neither problem disappears. Engineering the tradeoff correctly is the entire task.
For bidirectional operation, route to minimize torsional lash in both rotation directions rather than optimizing only for the dominant direction, since one-sided routing choices often reveal themselves as backlash the first time the tool reverses.
Why Model and Test Before Field Deployment?
Validate the specification with torsional-compliance modeling and dynamic routing simulation, backed by a short physical test using the intended tooling and duty cycle. Computer modeling identifies axial stretch and helixing as controllable failure modes well before a prototype is cut, which turns shaft selection into an engineering calculation rather than a series of field trials.
What to model:
- Torsional stiffness and deflection across the working torque range.
- Axial stretch under sustained load.
- The point-of-helix threshold for the selected construction.
- Internal friction at the tightest planned bend.
- Resonance modes within the intended RPM band.
A practical acceptance test protocol:
- Static torque test to confirm rated capacity before dynamic testing.
- Run-in period at target RPM to seat the inner core against the casing.
- Thermal-rise test under continuous duty to confirm casing temperature stays within limits.
- Vibration sweep across the full RPM band to locate resonance points.
- Surface finish measurement (Ra) across representative workpieces to confirm the system meets spec.
Set pass/fail criteria before testing begins: maximum acceptable temperature rise, vibration amplitude ceiling, and target Ra range. Log torque, RPM, temperature, and vibration data during acceptance runs, since flexible shafts run at 85% to 95% efficiency in typical installations, and any test result meaningfully below that band signals a routing or construction problem worth resolving before production release. Model-driven designs have shown 30% to 40% improvements in torsional stiffness and bending flexibility over older shaft standards, which justifies building a modeling margin into new specifications rather than defaulting to legacy values. Document every test result; it directly informs the next shaft grade or routing revision.
What Maintenance Schedule Preserves Shaft Life?
Follow the manufacturer’s lubrication interval, and inspect the sheath and inner wires at every scheduled downtime. Replace the shaft at the first sign of broken strands, kinks, or unusual stiffness in bending. Waiting for a visible failure costs more in unplanned downtime than a routine swap.
Lubrication cadence depends heavily on duty cycle. Light-duty applications can run three to six months between regreasing, while heavy professional use often calls for regreasing every 30 to 50 hours. Over-greasing is a real risk too: excess grease traps abrasive dust and accelerates wear rather than preventing it.
Inspection checklist for a maintenance plan:
- Daily: Visual check of the outer sheath for cracks, kinks, or exposed wire.
- Weekly: Coupling and collet runout check, handpiece bearing play, extraction system cleanliness.
- Quarterly: Full lubrication service, temperature-rise check under representative load, casing clamp integrity.
Expected shaft life depends on duty cycle severity, average bend angle, and contamination exposure, so treat published life figures as a starting estimate rather than a guarantee for a specific installation. Log every maintenance action against run hours, not calendar time, since duty-cycle-based logging catches wear trends that a fixed schedule misses.
Pro Tip: Treat sudden torque loss, visible smoke, or a sharp rise in vibration as immediate shutdown triggers, not conditions to monitor through the shift.
What Changes for Aerospace and Confined-Space OEM Applications?
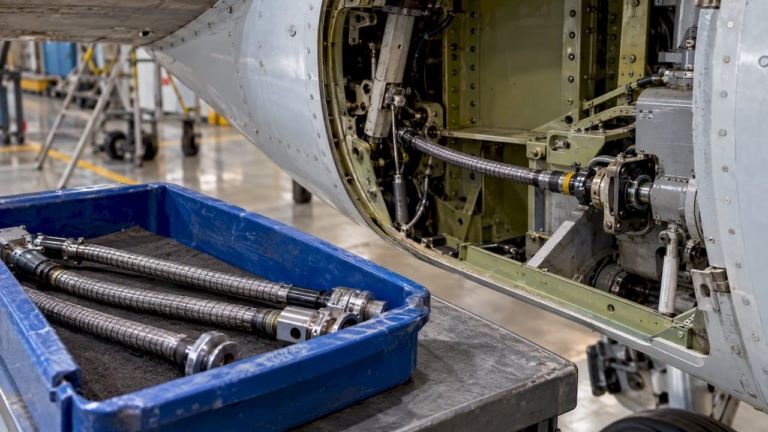
Aerospace finishing systems, thrust reverser mechanisms, flap and slat actuation housings, valve override shafts, and synchronization shaft assemblies impose tighter constraints than general industrial finishing. Routing space is smaller, redundancy requirements are stricter, and inspection access is often limited to scheduled maintenance windows rather than continuous operator observation.
Typical configuration choices in these contexts:
- Shorter shaft lengths to minimize cumulative torsional windup and reduce the number of supported bends.
- Higher torsional stiffness grades, accepting the routing flexibility tradeoff, where positioning accuracy matters more than tight-radius access.
- Redundant monitoring on critical systems, since a shaft failure in a synchronization or actuation path has consequences beyond finish quality.
- Stricter runout limits at every coupling interface, given the tighter tolerance stacks common in flight-critical housings.
- Contamination control matters more in these environments; sealed casings and controlled lubrication prevent particulate ingress into sensitive housings.
- Thermal exposure limits may be lower than in general industrial settings, which constrains motor sizing and duty cycle.
- Inspection access should be designed into the routing layout from the start, not retrofitted after the housing is finalized.
In one recurring routing scenario, a confined actuation housing required a bend radius tighter than the standard shaft construction allowed. The resolution was not a smaller shaft diameter, which would have sacrificed torque capacity, but a shorter overall shaft length paired with a stiffer construction grade and an additional intermediate support at the tightest bend.
An Engineering Perspective on Getting Flexible-Shaft Grinding Right
The mistake I see most often isn’t a bad shaft selection. It’s a shaft selected after the housing geometry is already frozen, which leaves no room to trade torsional stiffness for routing flexibility, or vice versa. Flexible-shaft drives reward early integration precisely because the two competing design variables, stiffness and bend flexibility, can only be balanced when both are still negotiable. Once the enclosure is fixed, you’re stuck compensating with motor torque or accepting a compromised finish.
Modeling isn’t optional overhead here. Torsional deflection, axial stretch, and the point-of-helix threshold are all measurable before a prototype exists, and skipping that step just moves the discovery process into the field, where it costs more and takes longer to diagnose. For complex or confined routing cases, especially in aerospace actuation systems, validating the specification with supplier engineering support before committing to tooling is worth the schedule time. You can start that conversation through BIAX Flexwellen’s contact page.
How BIAX Flexwellen Supports Grinding System Specification
Specifying a flexible-shaft drive correctly the first time avoids the costly cycle of prototype, field failure, and redesign. BIAX Flexwellen provides standard and custom flexible shafts, custom end fittings, and engineering support for torque, RPM, and routing requirements that fall outside catalog ranges, the exact variables this article has walked through.
For teams weighing whether a flexible shaft is the right architecture for a given finishing task, the rigid versus flexible shaft selection guide lays out the tradeoffs directly. Applications requiring high-speed capability can review the tool shaft product line rated up to 50,000 rpm. When routing constraints or torque requirements fall outside standard configurations, the custom flexible shaft design overview explains how engineering support works through the specification process. Readers ready to validate a specific torque, RPM, or routing requirement can start that conversation through the BIAX Flexwellen contact page.
Sources
- Flexible rotary shaft operation, uses, and advances | Machine Design
Recommended
- Flexible Shaft Drive Solutions: Unlocking Compact Efficiency
- Top 3 Flexible Drive Shafts for Finishing Processes Alternatives 2026
- Flexible drive solutions for efficient industrial design
- Proven tips for optimizing shaft design for industrial efficiency
Related Topics
Send your spec inquiry
Custom flexible shafts for your application — we quote within 1 working day.